
Creating a Website in TypeScript using Vite with Node.js
Introduction
Building a website with TypeScript is simple and can be done in just a few minutes.
In this guide we’ll use Node.js and Vite to create our project and run a development server.
By the end, you’ll have a fully functional website built with TypeScript!
About TypeScript
TypeScript is built on top of JavaScript, the very popular programming language that runs in all modern browsers.
JavaScript is a dynamically typed, interpreted language, meaning it doesn’t perform type checking before the code runs. This allows for faster development but can lead to runtime errors if values of unexpected types are used.
TypeScript makes JavaScript projects easier to manage by introducing static types and compile-time error checking.
Here’s an example of JavaScript without type annotations:
function multiply(a, b) {
  return a * b;
}

console.log(multiply(5, "hello"));
The function multiply defines 2 parameters a and b, but it doesn’t specify what type they are.
In the above example we pass in a number (5) and string ("hello") as arguments to the multiply function, which is executed and results in the value NaN being returned and logged (which means not a number), because multiplying a number by a string is invalid.
So, how do we only allow numbers to be passed as arguments to our function?
In TypeScript, we can assign types to parameters:
function multiply(a: number, b: number) {
  return a * b;
}

console.log(multiply(5, "hello"));
If we attempted to compile the above code into JavaScript, we would get a compile-time error: Argument of type 'string' is not assignable to parameter of type 'number'.
Now you see how types add safety and structure to your JavaScript code by preventing issues before the code even runs.
So, let’s get started with setting up a TypeScript project!
Installing Node.js
If you don’t already have Node.js it can be downloaded on their official website. It is one of the most popular tools for running JavaScript.
To verify that Node.js is installed, enter the following command in a terminal window:
node -vIf Node.js is installed correctly, the version number will be displayed.
Once you have Node.js set up, let’s create our TypeScript project!
Setting Up the Project
Now that we have Node.js, we’re going to set up our TypeScript project using Vite.
Vite is a simple and lightweight tool for building JavaScript web apps. It manages configuration and includes a development server, making it easy to start coding in TypeScript.
In a terminal window, run the following command:
npm create vite@latestWhen prompted, enter a project name, select the Vanilla framework, and choose TypeScript as the language.
After a short while, the project will be fully set up and ready to run!
Opening the Project
Now that you’ve created the project folder, open it. It’s recommended to use a text editor designed for coding, such as Microsoft’s free tool Visual Studio Code.
Your project will be structured like so:
public/
src/
.gitignore
index.html
package.json
tsconfig.json
The homepage index.html loads the src/main.ts script, which is the entrypoint to our application.
The file main.ts has the extension .ts, which means TypeScript. Let’s take a look at the file:
import './style.css'
import typescriptLogo from './typescript.svg'
import viteLogo from '/vite.svg'
import { setupCounter } from './counter.ts'

document.querySelector<HTMLDivElement>('#app')!.innerHTML = `
  <div>
    <a href="https://vite.dev" target="_blank">
      <img src="${viteLogo}" class="logo" alt="Vite logo" />
    </a>
    <a href="https://www.typescriptlang.org/" target="_blank">
      <img src="${typescriptLogo}" class="logo vanilla" alt="TypeScript logo" />
    </a>
    <h1>Vite + TypeScript</h1>
    <div class="card">
      <button id="counter" type="button"></button>
    </div>
    <p class="read-the-docs">
      Click on the Vite and TypeScript logos to learn more
    </p>
  </div>
`

setupCounter(document.querySelector<HTMLButtonElement>('#counter')!)
Right at the top we see import statements, which is a way to import resources from other files.
The statement document.querySelector<HTMLDivElement>('#app')! selects the HTML <div> element with the ID app. We then assign it some new inner HTML, which updates the page in real time.
Next, we see the same function document.querySelector() being used again to get the <button> element with the ID counter. We call the setupCounter() function and provide the HTML element as an argument.
To see what setupCounter() does, open the counter.ts file:
export function setupCounter(element: HTMLButtonElement) {
  let counter = 0
  const setCounter = (count: number) => {
    counter = count
    element.innerHTML = `count is ${counter}`
  }
  element.addEventListener('click', () => setCounter(counter + 1))
  setCounter(0)
}
This function takes the <button> element and adds a 'click' event listener to it. Now, every time the button is clicked, the code () => setCounter(counter + 1) will run.
The function setCounter() updates the count and button text with a new counter value.
It’s always a good idea to separate code into different files where possible. Having all of your code in one file makes it harder to manage and maintain.
Running the Project
To run the project, first we need to install the project packages.
Run the following command in the terminal:
npm installMake sure to run this command inside your project folder where package.json is located.
Once all the packages are installed, run the project with:
npm run devThis will start the development server so you can see the code in action. Check the terminal output for the URL once it finishes starting (e.g. http://localhost:5173/).
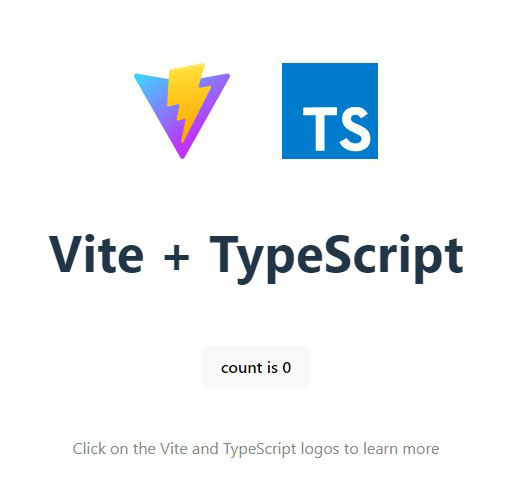
When you visit the development server, you should see the homepage with the counter:
If you look in the terminal, it will say watching for file changes... which means when you make code changes it will automatically recompile and reload the server.
Now, changes to your code will automatically be visible without even needing to refresh the browser page!
Publishing the Website
You may have noticed in index.html the reference to main.ts, which is a TypeScript file.
Since browsers don’t run TypeScript directly, it must be compiled into JavaScript. The development server handles this automatically and watches for file updates.
When you’re finished coding and ready to generate JavaScript for production, run the following command to build your website:
npm run buildThis will build the project and output it to the dist/ folder. Now, if you check the dist/index.html file, it no longer references main.ts, but instead points to a JavaScript file.
Now, your website is complete and ready to be published to the world!
A number of providers will host static websites for free. Our website is static because we serve the same files for every user and the compiled JavaScript runs in the browser.
The official Vite docs show you how to deploy your static website to a number of different providers like GitHub and Cloudflare.
Conclusion
Congratulations! You’ve just created, built, and prepared a TypeScript website ready for deployment.
From here, you can customize your site further and explore more advanced features of Vite and TypeScript.